Android Push Notifications using GCM (Google Cloud Messaging)
Introduction
Hi, this is my first post as a blogger, in this post I ‘ll show you how to send push notifications using GCM (Google Cloud messaging) from our HTTP server (or using curl, Postman or any Http Client).
This post shows the new method which is using google-services.json
Google provides GCM(Google Cloud Messaging) servers that allow sending downstream messages to registered Android devices and upstream messages from Device to Servers. In this post the focus will be only on the former part of sending downstream messages to Device from our server.
GCM Messages can have a maximum payload data of 4kb, enough to accommodate a Notification Title, the content and an image url and some other internal data that may be needed by the application for performing the required action like synchronizing the data like emails, product list, messages etc.
Let us have a look at the working Architecture:-
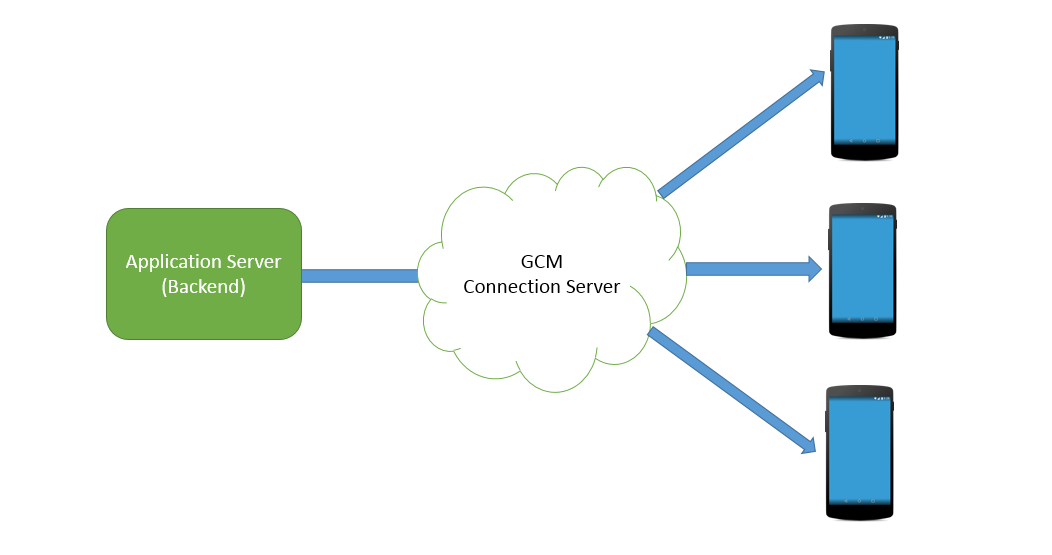
Let me clear a major misconception that GCM Messages are Notifications, but GCM Messages are the payload (usually JSON data) that is sent from the server to our Device (or multiple devices), the android device receives the JSON payload in real-time and the code implemented in Android Application may or may not display a notification based on the data received.
So let us get started implementing the Push Notifications in our app. In first step we will generate a Server API Key, for identifying our server backend , In second step we will generate a device token that will be used as an identity for our device for receiving messages.
Register the Application and Generate API Keys
We need to register our application and generate the google-services.json which will contain the API keys required.
-
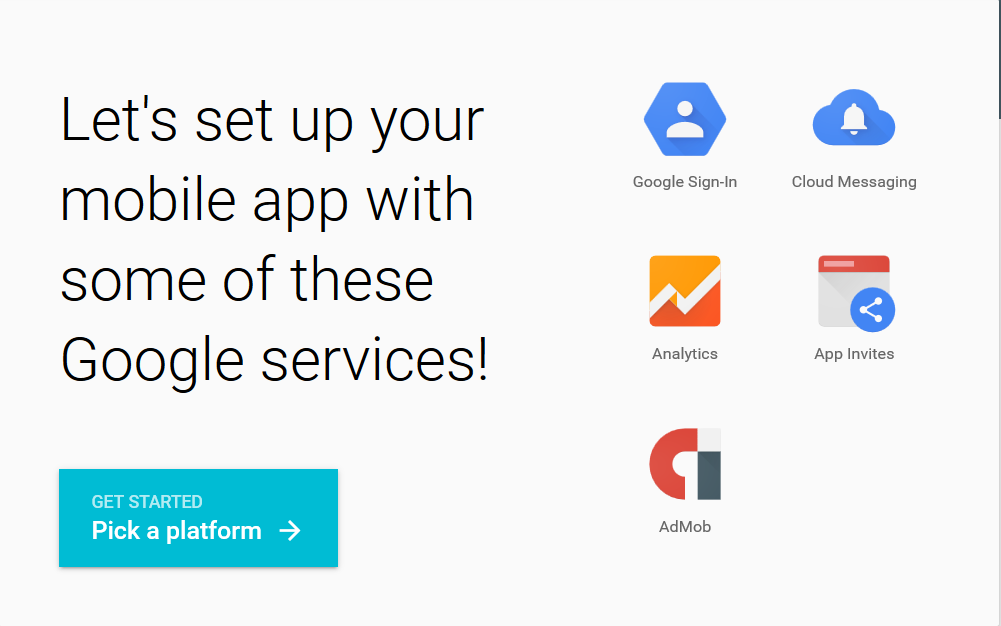
Open https://developers.google.com/mobile/add to GCM services to our app. Follow these steps to generate the google-services.json file
-
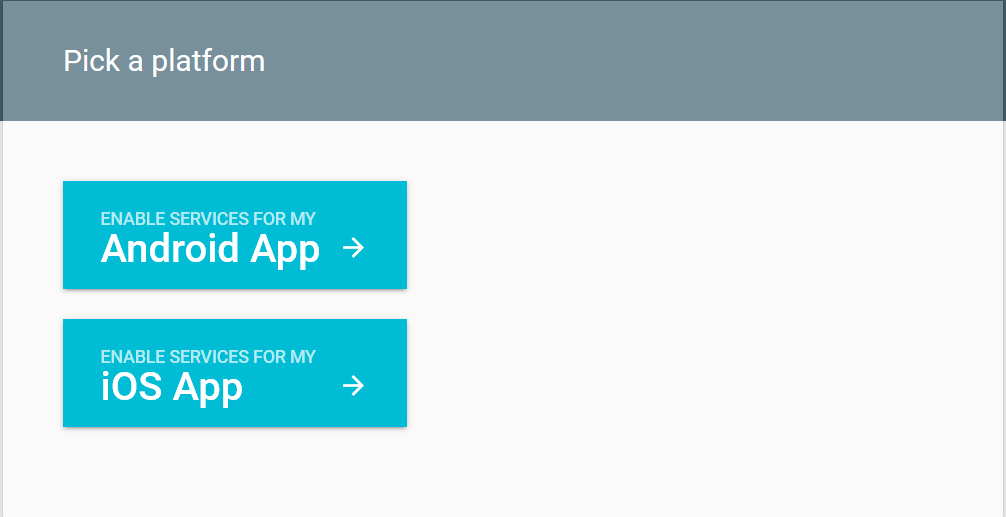
Click on “Pick a Platform”
-
Choose “Enable Services for my Android App” (in this case we are doing it for Android)
-
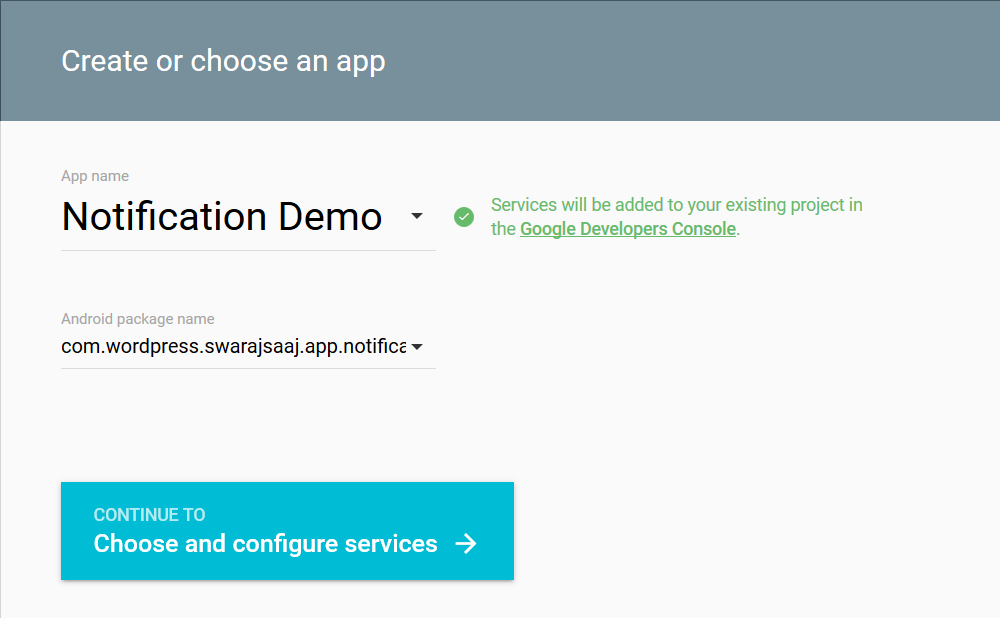
Give your application name in “App name” and the package name for our application in “Android package name”, in case you don’t know the package name, you can check it in your AndroidManifest.xml file in the first line in manifest tag) and click “Continue and configure services”
-
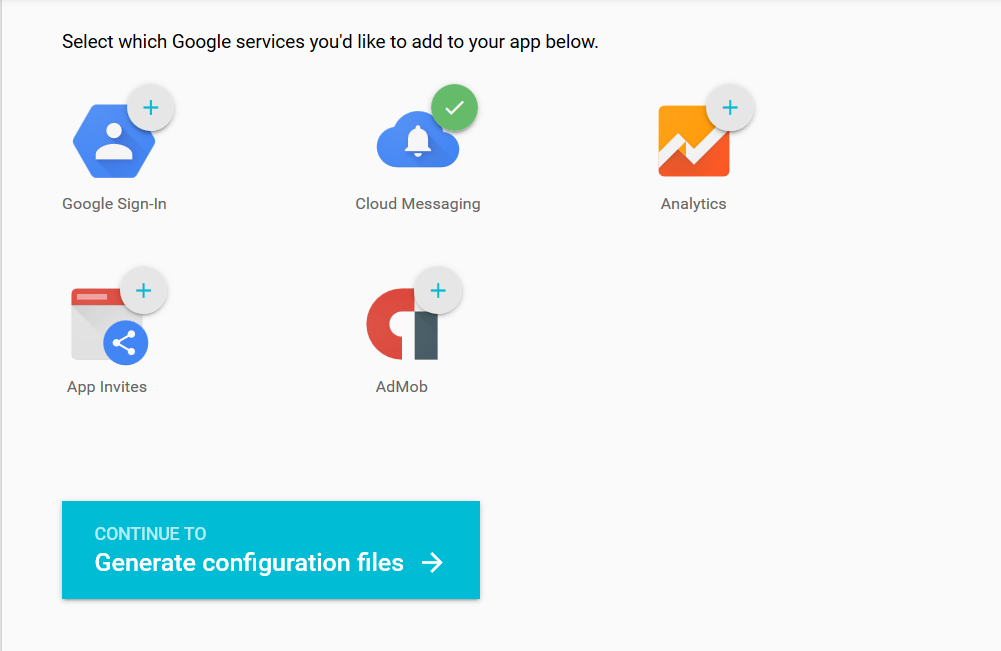
In this screen , you can choose the services which you want to add to enable for the application, Choose “Cloud messaging” as of now.
-
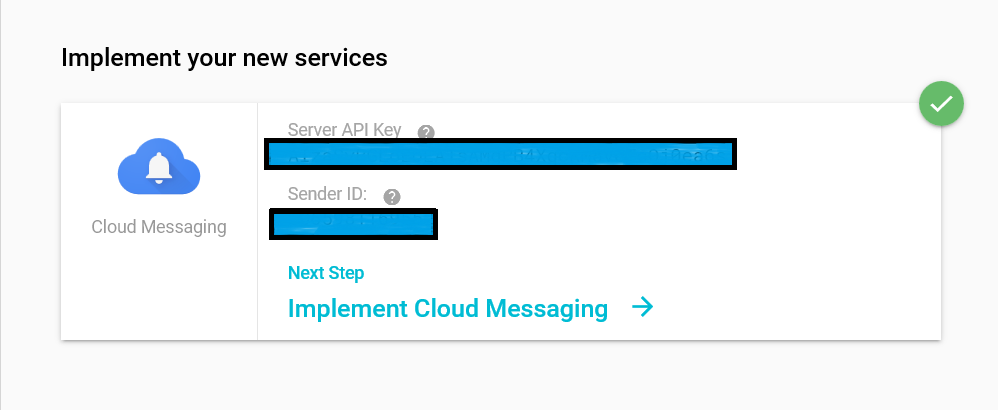
Okay, we are good with configuration now, Save the “Server API Key” and “Sender ID” at some place, we will need it later.
-
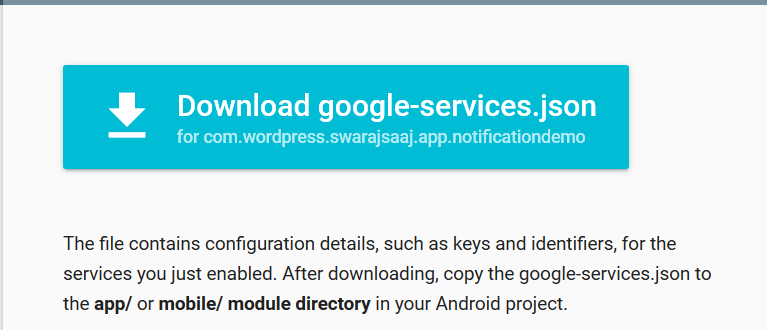
Click “Generate Configuration files” Download the “google-service.json” file by clicking on “Download google-services.json” button.\
Setting up Android App for receiving the GCM Messages and displaying Notifications
Guide to set up the Android App (Client Side) for receiving the GCM Push notifications.
-
Create a New Project by going to File->New->New Project and make sure to create the app with package name as you gave in last section while obtaining google-services.json
-
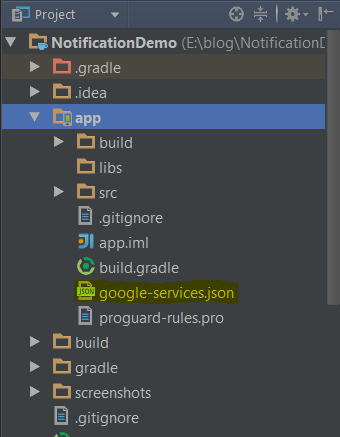
Copy google-services.json to your project’s app/ folder
-
Add following classpath to your project level build.gradle file
classpath 'com.google.gms:google-services:1.5.0-beta2'
4.Add following dependency to your app level build.gradle file
    dependencies {
       compile "com.google.android.gms:play-services:8.3.0"
    }
5.Apply the google services plugin by adding following line at end of app level build.gradle
apply plugin: 'com.google.gms.google-services'
6.Edit AndroidManifest.xml to add following permissions and Listeners
<manifest xmlns:android="http://schemas.android.com/apk/res/android"
    package="com.wordpress.swarajsaaj.app.notificationdemo">

    <application
        android:allowBackup="true"
        android:icon="@mipmap/ic_launcher"
        android:label="@string/app_name"
        android:supportsRtl="true"
        android:theme="@style/AppTheme">

        <activity android:name=".MainActivity">
            <intent-filter>
                <action android:name="android.intent.action.MAIN" />
                <category android:name="android.intent.category.LAUNCHER"/>
            </intent-filter>
            </activity>

        <uses-sdk android:minSdkVersion="8" android:targetSdkVersion="17"/>
        <uses-permission android:name="android.permission.WAKE_LOCK" />

        <receiver
            android:name="com.google.android.gms.gcm.GcmReceiver"
            android:exported="true"
            android:permission="com.google.android.c2dm.permission.SEND" >
            <intent-filter>
                <action android:name="com.google.android.c2dm.intent.RECEIVE" />
                <category android:name="com.wordpress.swarajsaaj.app.notificationdemo" />
            </intent-filter>
        </receiver>
        <service
            android:name=".MyGcmListenerService"
            android:exported="false" >
            <intent-filter>
                <action android:name="com.google.android.c2dm.intent.RECEIVE" />
            </intent-filter>
        </service>
        <service
            android:name=".MyInstanceIDListenerService"
            android:exported="false">
            <intent-filter>
                <action android:name="com.google.android.gms.iid.InstanceID" />
            </intent-filter>
        </service>
        <service android:name=".RegisterationService"/>

    </application>

</manifest>
In detail, above we have added, 1 receiver and 3 services:-
<receiver
    android:name="com.google.android.gms.gcm.GcmReceiver"
    android:exported="true"
    android:permission="com.google.android.c2dm.permission.SEND" >
    <intent-filter>
        <action android:name="com.google.android.c2dm.intent.RECEIVE" />
        <category android:name="com.wordpress.swarajsaaj.app.notificationdemo" />
    </intent-filter>
</receiver>
GcmReceiver is the receiver that receives the downstream messages from GCM Server, when sent to this device.
com.google.android.c2dm.intent.RECEIVE
permission is needed so that this receiver can receive messages that belong the package specified in category i.e.
com.wordpress.swarajsaaj.app.notificationdemo
<service android:name=".RegisterationService"/></pre>
<pre><service
 android:name=".MyInstanceIDListenerService"
 android:exported="false">
 <intent-filter>
 <action android:name="com.google.android.gms.iid.InstanceID" />
 </intent-filter>
</service></pre>
<pre><service
 android:name=".MyGcmListenerService"
 android:exported="false" >
 <intent-filter>
 <action android:name="com.google.android.c2dm.intent.RECEIVE" />
 </intent-filter>
</service>
These 3 services will be implemented in next steps, lets discuss what they are for:-
RegisterationService:- Registers our device for the first time so that we can have a token for device identity, which will be used for sending the GCM messages/notification to this device.
MyInstanceIDListenerService:- Instance ID is the token for our device that was received during registering our device at GCM Server, if the token is refreshed due to any reason this service handles the device registration once again and updating the token on our backend server.
MyGcmListenerService:- This will be our interface to all the GCM messages being redirected to our app, We can either show notifications for these messages, process them in background or perform any database operations etc.
Lets get our hands on some Java code
1.Lets create the RegisterationService.Java that serves the simple purpose of registering our application and logs a the token against which the device is registered.
package com.wordpress.swarajsaaj.app.notificationdemo;

import android.content.Intent;
import android.os.Bundle;
import android.support.v7.app.AppCompatActivity;
import android.util.Log;

/**
 * Created by swarajpal on 06-03-2016.
 */
public class MainActivity extends AppCompatActivity {


    private final String TAG = this.getLocalClassName();

    @Override
    protected void onCreate(Bundle savedInstanceState) {
        super.onCreate(savedInstanceState);
        Log.d(TAG,"Creating token");
        Intent intent = new Intent(this, RegisterationService.class);
        startService(intent);
    }
}
2.Create MyInstanceIDListenerService.java as discussed above.
package com.wordpress.swarajsaaj.app.notificationdemo;

import android.content.Intent;

import com.google.android.gms.iid.InstanceIDListenerService;

/**
 * Created by swarajpal on 06-03-2016.
 */
public class MyInstanceIDListenerService extends InstanceIDListenerService {

    private static final String TAG = "MyInstanceIDLS";

    /**
     * Called if InstanceID token is updated. This may occur if the security of
     * the previous token had been compromised. This call is initiated by the
     * InstanceID provider.
     */
    @Override
    public void onTokenRefresh() {
        // Fetch updated Instance ID token and notify our app's server of any changes (if applicable).
        Intent intent = new Intent(this, RegisterationService.class);
        startService(intent);
    }
    // [END refresh_token]
}
The onTokenRefresh() method re registers the application using RegistertionService.java , you may optionally update the token on your server in this part.
3.Create the MyGcmListenerService.java for receiving the Push messages.
package com.wordpress.swarajsaaj.app.notificationdemo;

import android.app.NotificationManager;
import android.app.PendingIntent;
import android.content.Context;
import android.content.Intent;
import android.media.RingtoneManager;
import android.net.Uri;
import android.os.Bundle;
import android.support.v4.app.NotificationCompat;

import com.google.android.gms.gcm.GcmListenerService;

/**
 * Created by swarajpal on 06-03-2016.
 */
public class MyGcmListenerService extends GcmListenerService {

    private static final String TAG = "MyGcmListenerService";

    /**
     * Called when message is received.
     *
     * @param from SenderID of the sender.
     * @param data Data bundle containing message data as key/value pairs.
     *             For Set of keys use data.keySet().
     */
    @Override
    public void onMessageReceived(String from, Bundle data) {
        String message = data.getString("message");
        //Launch Notification
        sendNotification(message);
    }

    /**
     * Create and show a simple notification containing the received GCM message.
     *
     * @param message GCM message received.
     */
    private void sendNotification(String message) {
        Intent intent = new Intent(this, MainActivity.class);
        intent.addFlags(Intent.FLAG_ACTIVITY_CLEAR_TOP);
        PendingIntent pendingIntent = PendingIntent.getActivity(this, 0 /* Request code */, intent,
                PendingIntent.FLAG_ONE_SHOT);

        Uri defaultSoundUri = RingtoneManager.getDefaultUri(RingtoneManager.TYPE_NOTIFICATION);
        NotificationCompat.Builder notificationBuilder = new NotificationCompat.Builder(this)
                .setContentTitle("GCM Message")
                .setSmallIcon(R.mipmap.ic_launcher)
                .setContentText(message)
                .setAutoCancel(true)
                .setSound(defaultSoundUri)
                .setContentIntent(pendingIntent);

        NotificationManager notificationManager =
                (NotificationManager) getSystemService(Context.NOTIFICATION_SERVICE);

        notificationManager.notify(0 /* ID of notification */, notificationBuilder.build());
    }
}
The onMessageReceived has two arguments String “from” and Bundle “data”, data contains the payload which is sent from the server.
sendNotification() method is a simple bare bones method for displaying notifications using NotificationManager.</li>
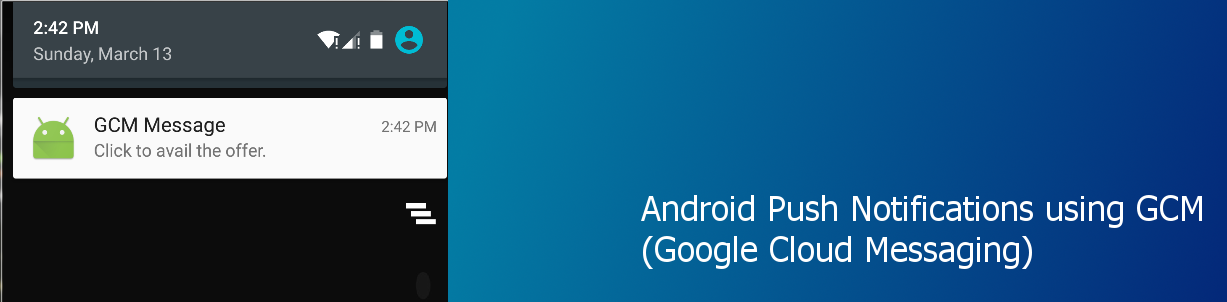
<li>Build and Launch the application using Phone or emulator, and lets test using POSTMAN which allows us making HTTP requests, or you can also send one using cURL using command line.Once you have run the application, the first thing it does is Register the device for a GCM token and Log it in console , here as shown.

Copy this token , which will be needed while sending the GCM message.Lets understand the JSON payload we are going to send to our device from server
{
 "data": {
        "title": "offer 3.",
        "message": "Click to avail the offer."
        },
 "to" : "<YOUR_DEVICE_TOKEN>"
}
We have in Headers the Authorization: key=<YOUR_SERVER_API_KEY> which has our API_SERVER_KEY that we got in last section while registering our app. Here “data” is the payload that will actually be transmitted to our device , we have two string in data json, the title and message that are handled in our MyGcmListenerService.java as shown in previous step. The “to” field contains the token of the device we got after device registration, which denotes where the json payload will be sent to.
Now you can make the http request using your backend server if you already have one like:-
- Use Guzzle if you are using PHP
- Use Unirest for alot of other languages
- Make request using $.post, $.ajax using jQuery.
Or if you dont have a backend yet, you can always try out using following methods.
Sending Request using POSTMAN,
Assuming you have downloaded and installed POSTMAN in chrome, lets use following configuration

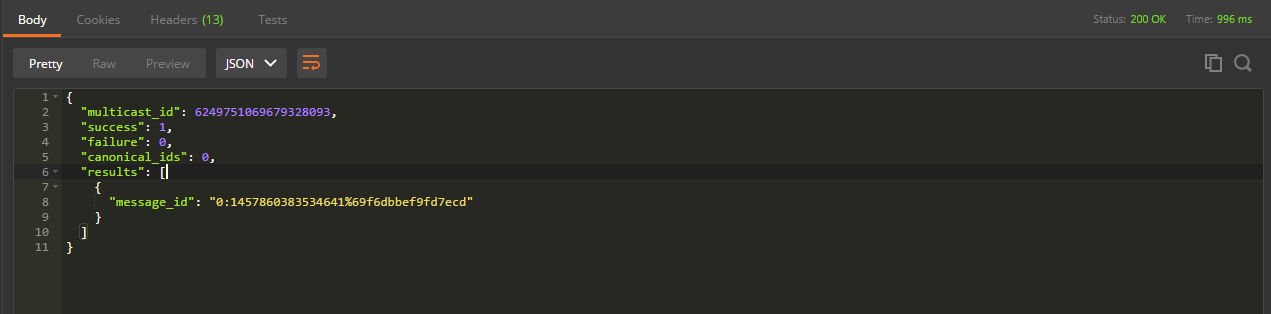
 If all goes well you will have the notification on your device, and following response to HTTP request
Using command line (cURL)
Assuming you have CURL installed, just go to your command line and use following command
Windows
curl -X POST -H "Authorization: key=<YOUR SERVER KEY HERE>" -H "Content-Type: application/json" -H "Cache-Control: no-cache" -H "Postman-Token: 1ad4c9bd-6f9e-09e1-cd34-8ff13a22944d" -d @body.json "https://gcm-http.googleapis.com/gcm/send"
Here body.json is the file which contains the JSON payload
{ "data": {
            "title": "offer 3.",
            "message": "Click to avail the offer."
           },
  "to" : "<YOUR_DEVICE_TOKEN>"
}
Linux/Mac
curl -X POST -H "Authorization: key=<YOUR_SERVER_API_KEY>" -H "Content-Type: application/json" -H "Cache-Control: no-cache" -H "Postman-Token: bc5590f1-4f7a-b588-888c-01fcd0371710" -d '{ "data": { "title": "offer 3.", "message": "Click to avail the offer." }, "to" : "<YOUR_DEVICE_TOKEN>" } ' "https://gcm-http.googleapis.com/gcm/send"
The device you are running on must have Google Play Services installed. (i.e. Google Play)
So thats it, we have the notification in our application finally after a long marathon.

This was a simple demonstration of how to get started with GCM Push notifications, you can further send messages to topics, create groups for devices etc. You can further read here.
Feel free to comment if you find this post useful or have any doubts or issues in setting this up.
Download Source Code
~@swarajsaaj